
Before we get started, we want to say a massive hello to the readers of marsupialsociety.org. We have recently acquired the website and cannot wait to welcome more marsupial lovers into our community.
If you love wildlife, then you may be familiar with the term “marsupial”. Marsupials are a unique type of mammal that are well-known because they carry their young in a very different way to most animals.
Marsupials live all over the world, but naturally the large majority of marsupials hail from Australia and the Southern Hemisphere. Despite this, most Westerners are familiar with marsupials. Even if they don’t know exactly what they are. In fact, when you ask most people what a marsupial is, the only marsupial that many people will be familiar with is the kangaroo.
But, in reality there are lots of different types of marsupials out there. Marsupials are essentially a sub-species of mammals, separated because they do not have placental births or carry their young to full-term. Instead, the offspring of marsupials spend a small portion of development in their mother’s womb, and a much longer portion of development in their mother’s pouch.
To help you understand all there is to know about marsupials, we’ve put together this ultimate guide to marsupials. In this guide, we’ll be taking a look at what marsupials are, what makes them different, what the different types of marsupials are, and lots more. By the time you finish reading, you will feel like an expert on marsupials!
Before we jump in, we’d just like to extend a big, warm welcome to our readers joining us from marsupialsociety.org. We’ve recently acquired the website, and we’re eager to welcome even more animal-lovers to our tribe!
What Are Marsupials?
First things first, let’s take a look at what marsupials are. If you love animals, then you will likely be familiar with the term “marsupial” and what this term means. Marsupials are classified in this category because of the unique way in which they give birth. But, they are not their own grown group of animals. Instead, they are a sub-species of mammals, and there are a lot of different animals classified as marsupials.
Marsupials are famous because they have pouches. Their young will be delivered when they are not yet fully developed, and then they will be transferred to the pouch. In the pouch, the young will get all the nutrients that they need from their mothers, and this will allow them to grow big and strong, ready for life in the outside world.
It is believed that there are more than 250 different species of marsupials across the globe. Some are incredibly well-known, such as the kangaroo, while some are lesser known, such as the Northern Bettong. Some marsupials exist in abundance, while others are endangered. Just like every other type of animal across the globe, Marsupials are also a part of the circle of life, even if it can be tragic from time to time.
How Are Marsupials Different to Most Mammals?
As we have just established, marsupials are a type of mammal. However, despite this, many people believe that marsupials are a different species to mammals. This is because of the way in which marsupials deliver their young, which is something we’ll look at in more detail shortly.
The majority of mammals give birth vaginally. Just like human beings, the offspring of most mammals will ideally be carried in their mother’s womb till full-term. Once the offspring has reached full term, the mother’s body will naturally put her into labor, and the offspring will be delivered vaginally. Unless further medical intervention is needed.
At delivery, the offspring will be fully developed and able to survive in the wild as long as they are looked after by their mother. During their time in the womb, the offspring will be given all the nutrients that they need to grow and survive through the placenta that connects them to their mother’s body.
But this isn’t the case for marsupials. While marsupials do deliver their young vaginally, they are not placentals, and as a result, they do not grow to full-term in the womb of their mother. Instead, they are delivered a little earlier. So, let’s take a look at how marsupials deliver their young.
How Do Marsupials Deliver Young?
As marsupials are a type of mammal, this means that they give birth to live young. Almost all mammals give birth to live young, with the exception of the duck-billed platypus that delivers offspring using eggs. By living young, we mean offspring that is able to breathe on its own, even if it cannot do everything for itself.
The majority of mammals, largely made up of placentals, will give birth to heavily developed young. With the exception of human offspring, the majority of mammals will not only be able to breathe when they are born, they will also be able to walk within a few hours of being born, and in no time at all, they will be able to imitate a lot of the behavior that their parents exhibit.
But marsupials do not deliver fully developed young. Their young are not carried to term, and that is because these animals are not physically designed to give birth to large offspring. Instead, they have a pouch. Not only is this pouch the physical attribute that makes marsupials most famous, it also plays a huge role in the development of their offspring.
Just like placentals, marsupials will give birth to their offspring vaginally. Marsupials have different lengths of pregnancy, depending on the type of marsupial, however, typically the pregnancy length for these animals will be around a month at most. After this time has passed, the embryo of the marsupial will be delivered vaginally. At this time, the embryo will be absolutely tiny, and that is because development will continue once it is transferred to the pouch.
Once delivered, the embryo will travel to the pouch. It will not be moved by the mother, instead the embryo will move itself to the pouch. This is not a small task, in fact, it is a pretty monumental journey, and it really is one of the true wonders of nature. Of course, it is helped on its way by the mother licking a path for the embryo to follow.
In the pouch, the offspring will be able to latch onto its mother’s nipple, and from there it will be able to consume breast milk that will give it all the nutrients it needs to grow. The baby will remain in the pouch for a differing amount of time depending on the species, but it will stay in the pouch until it is fully developed to survive in the outside world. It will then emerge from the pouch fully grown to the same stage as a baby carried to term in the womb, and delivered vaginally.
Different Types of Marsupials
As we said earlier, there are actually more than 250 types of marsupials that exist across the world. While the vast majority of these creatures live in Australia and the surrounding regions, marsupials can be found across the globe in zoos and conservation centers. So there is a good chance that you will encounter a marsupial at some point in your life.
Among the obvious marsupials, such as kangaroos, koalas, and wallabies, there are a lot of other different types of marsupials too. There are too many for us to speak about them all, but now we’re going to take a look at some of the most unique marsupials on the planet.
Koalas
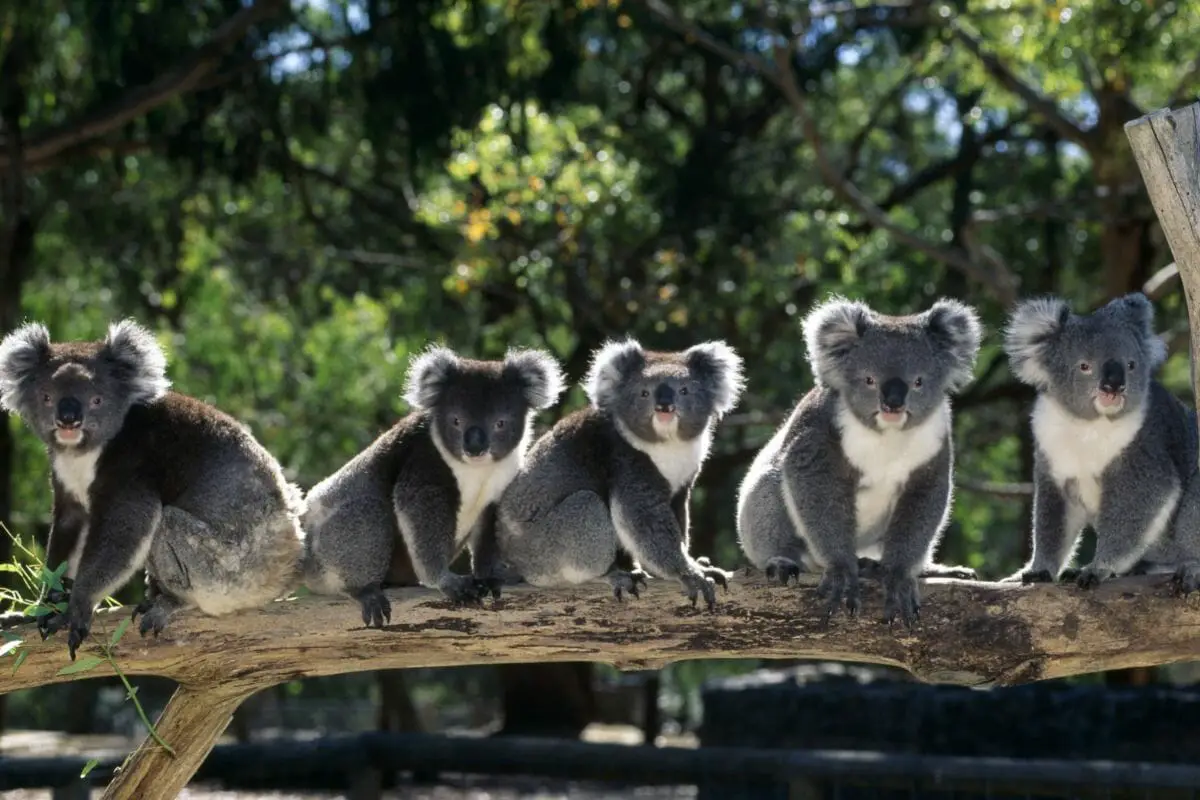
First up, we have the koala, or the koala bear as it is more commonly known. The koala is easily one of the cutest creatures on the planet, so cute in fact that many people want to keep one as a pet.
While, unfortunately, you cannot keep a koala as a pet, you can find them across the globe, and in many cases, you will be able to see a koala at your local zoo if it takes part in conservation projects. But, by far, the best place to see a koala for the first time is in their natural habitat, and that is one of the biggest draws of Australia.
Koalas are incredibly smart animals that spend a huge amount of their time eating eucalyptus and sleeping for up to 22 hours a day. They have a very distinctive call, and in their natural habitat, koalas spend a lot of time high up in the trees, far away from humans and in a place where they feel safe to sleep. Koalas are not dangerous in the traditional sense, but they have been known to lash out if they feel threatened. This is why it is best not to approach any koalas that you encounter in the wild.
As well as being famous for their incredibly soft fur, adorable faces and black button noses, koalas are also famous for their association with certain diseases. While koalas are fairly harmless in terms of them attacking you, the risk of you catching a disease if you come into contact with a koala is very real.
If you are bitten by a koala, there is a real chance that you could become infected with lonepinella disease. Koalas carry lonepinella bacteria in their mouths, and this can be transferred into the wound when they bite you. If you catch this disease, then you will typically need to have debridement of the wound which is a very painful procedure. That’s without even mentioning the fact that a large amount of koalas have chlamydia.
Just like all marsupials, koalas will deliver semi-developed young that is then transferred to the pouch. Typically, a koala pregnancy will only have a gestation period of around 30-36 days. After this, labor will occur and the koala will make its journey from the vagina to the pouch. Once in the pouch, the koala embryo will latch onto the nipple for milk, and remain in the pouch for 8-9 months. During this time, the young koala will continue to grow and develop until it is ready for life in the real world.
One thing that sets the koala bear apart from other marsupials is the shape of its pouch. Koalas have a very unique pouch which essentially opens backwards and downwards. While this may seem a little odd, there is a very good reason for the shape of their pouch, and that is that it prevents their young from falling out of the pouch while they climb. Cool, right?
Sadly, these beautiful creatures are actually considered endangered. Huge bush fires have wiped out their natural habitat and they are under threat by a wide variety of animals that actually eat koalas. That is why adopting a koala and helping a charity to support these creatures is a great idea. There are plenty of places across Australia that will allow you to adopt a koala for a small fee each month in return for updates about your chosen koala. Every little bit helps to protect these precious creatures.
Kangaroos
Perhaps the most famous type of marsupial on the planet is the kangaroo. Just like the koala, this species of animal hails from Australia, but kangaroos are famous across the globe. Thanks to Kanga and Roo in the Winnie the Pooh franchise, people all over the world already know quite a bit about kangaroos, and that is why they are the most well-known marsupial on the planet.
Kangaroos are miraculous creatures. They are incredibly intelligent, and incredibly strong too. While they are totally adorable and shy, they are also willing to put up a fight when needed, and they very rarely back down. When they feel threatened, kangaroos will lash out, which is why you need to be very careful if you encounter one in the wild and never run away if you do. Yet these occasionally violent creatures are also scared of the sound of their own feet.
These animals are commonly confused with wallabies. But these are actually two different types of animals, and we’ll be looking at wallabies shortly. While wallabies are different to kangaroos, there are actually a variety of different types of kangaroos, including red kangaroos, gray kangaroos, and lots more.
One of the things that kangaroos are famous for is their ability to jump. Kangaroos can jump incredibly high, and they can run incredibly fast too. Kangaroos get exercise in many different ways. As well as jumping and running, these animals also swim, and they have been known to spend lots of time in the water. So much time, in fact, that there have been instances where kangaroos have tried to drown other animals when threatened.
However, undoubtedly the thing that has made kangaroos most famous across the world is the fact that they have pouches. They are by far the most well-known marsupial across the world, and their ability to carry their young in their pouch really is incredible.
Despite common misconceptions, kangaroos cannot be found in Africa. They are native to Australia, New Guinea and the neighboring islands, and they cannot survive in the cold weather that other countries have. Their ability to jump around and the shape of their hind legs often has people expecting kangaroos to be related to rabbits, but this isn’t actually the case. Instead, these animals are simply similar to one another. At this point, it is also worth noting that kangaroos aren’t rodents either.
Just like koalas, the entire pregnancy and birth experience of kangaroos is truly magical. It is one of the beauties of nature, and you only need to watch a nature documentary to see how beautiful it is to watch a joey grow. Kangaroo pregnancy lasts anywhere between 30 and 36 days depending on the type of kangaroo, after which the kangaroo will give birth. The kangaroo embryo will then make its way to the pouch where it will remain until it is developed enough to survive. After this, kangaroos will typically live for between 6 and 10 years.
As the entire point of a kangaroo’s pouch is for their young to continue growing after they exit their mother’s vagina, you may expect that only female kangaroos have pouches. And if you think that, you are correct! Male kangaroos do not have pouches, and that is because a kangaroo’s pouch only develops in pregnancy. As male kangaroos cannot get pregnant, they do not develop pouches. So, it is the mother’s job to carry the young, even after she gives birth.
While kangaroos can be pretty ferocious when necessary, they are not at the top of the food chain. There are plenty of predators out there, and many that eat kangaroos. As a result, it is not uncommon for humans to step in and hand rear joeys. Despite this, kangaroos are not endangered, so there is still a very good chance that you will see a kangaroo in the wild if you visit one of the countries where they live.
Wallabies
Wallabies look very similar to kangaroos, and that is why many people get these two species of animal confused.
Kangaroos and wallabies have similar shaped legs, they can both bounce and run fast, but they are actually rather different from each other. Some of the key differences between these two species of animal include their size, their color patterns, their teeth, and their life expectancy too. But, these differences aside, these creatures really are similar.
One of the biggest similarities between wallabies and kangaroos is their diet. Both of these creatures eat a plant-based diet, feasting on a variety of different plants that exist in the areas in which they reside. However, it is worth noting that they reside in very different habitats, which is why the chances of getting a wallaby-kangaroos crossbreed are incredibly slim.
Wallaby pregnancy generally lasts for between 30 and 36 days depending on the type of wallaby, after which the wallaby will deliver the offspring vaginally. Just like with all marsupials, the wallaby will then travel to the pouch and remain there for a number of months, protected from the outside world by its mother.
Opossum
All the marsupials that we have looked at this far have been animals that are native to Australia and the surrounding regions. But marsupials are not only found in Australia, in fact, the opossum is a marsupial and, as you probably already know, this creature is native to the Americas.
In the USA, opossums can be more of a nuisance than an animal that is to be admired (in the same way that kangaroos are). While they are gentle creatures, they have a habit for eating trash, breaking into trash bins, and generally causing a mess. Their attraction to all things dirty causes them to carry disease, which is why many people are very anxious about getting bitten by an opossum. Opossums have a large amount of teeth, and it is these teeth that allow them to effortlessly break into your trash bin.
In less built-up areas, opossum may enjoy all sorts of different activities. But, generally if you encounter one in the suburbs, you will typically find an opossum in the trash, up a tree, or in the search for food to eat.
However, while they may have a bit of a bad reputation in the wild, people actually keep opossums as pets. These gentle creatures can make excellent pets, and when domesticated they will make an excellent companion. While these creatures can be dangerous, and are often mistaken for rodents in the wild, they are actually very loving creatures.
In the winter, you may notice less activity from opossums in your area, however this doesn’t mean that they hibernate. They simply are less active in the winter, and tend to be a lot slower, and who can blame them?
Just like all other marsupials, opossums have a pouch in which they carry their young. So, be aware that any opossums in your area could actually be carrying offspring, and this could explain if they are being a little more aggressive than nature.
Opossums are typically pregnant for about 14 days, and they will stay in the pouch for around 2 months. Typically opossum litters will consist of multiples, with up to 9 babies in each litter. But the process of vaginal birth and development in the pouch is exactly the same as it is for all other marsupials.
Quokka
Quokkas are an absolutely adorable type of macropod marsupial. They eat a herbivorous diet and they have the sweetest little faces in the world. Like most other marsupials, these tiny little things hail from Australia, and this is the only place where they will be found in the wild.
Quokkas look incredibly sweet, and that is why many people expect them to be friendly. They are inquisitive little creatures, and typically they will approach people if they encounter them. However they are also very skittish, so don’t be surprised if any quokkas you see tend to run away from you.
With creatures as adorable as quokkas, it is understandable that many people wish to keep these creatures as pets. Unfortunately, this is another creature to add to the long list of animals that are not suitable to be kept as pets. The amount of work that would be required to look after quokkas in the wild is far too much to ever be possible, so instead it is simply best to enjoy these animals when you see them in their natural habitat.
The gestation period for a quokka is around 28 days, after which the offspring will be delivered and then the tiny quokka babies will make their way to the pouch. They will then continue to grow for a further 6 months in the pouch, before emerging and joining their mother in the wild but beautiful world we live in.
Wombats
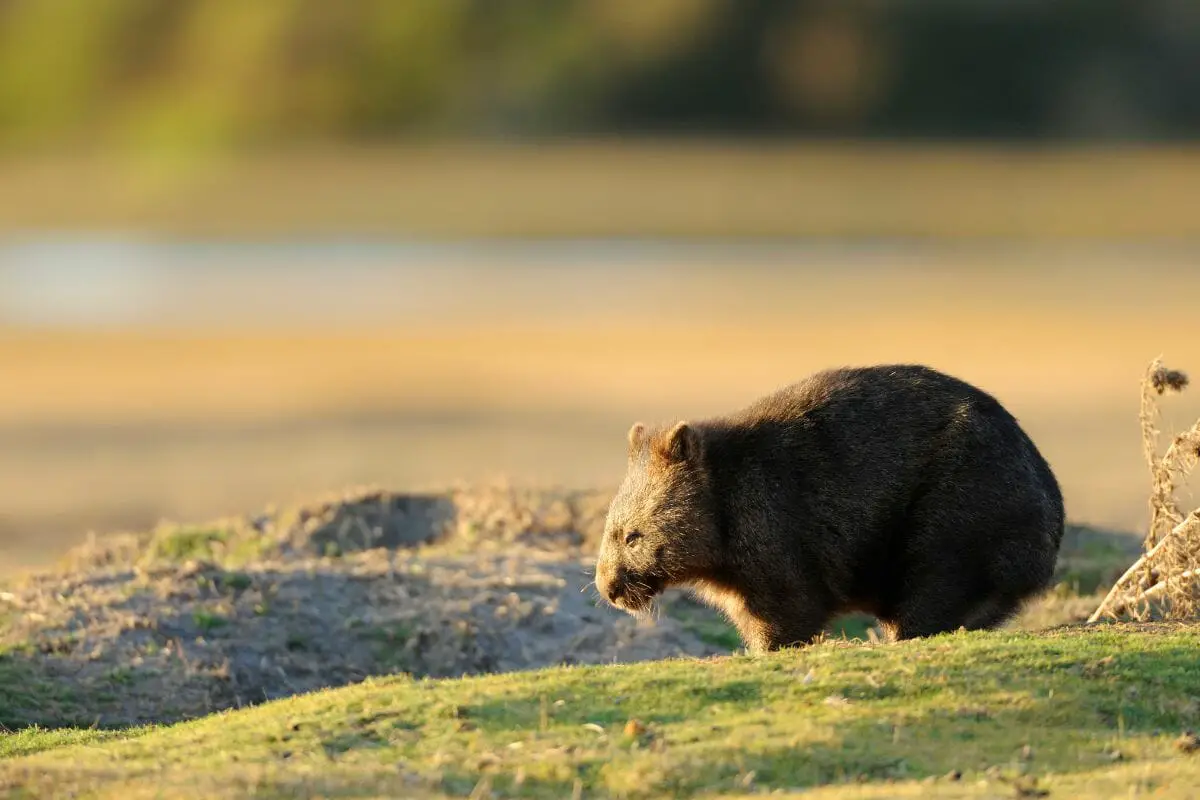
Yet another fascinating creature that lives in Australia is the wombat. Wombats are a chunkier type of marsupial with long bodies but incredibly short legs. They can weigh up to 35 kilograms, so they are by no means small, and they can actually be fairly intimidating when you encounter one for the first time.
A lot of people expect wombats to be omnivores because of their size. However, this isn’t the case. Wombats do not have the ability to hunt prey, or the physical strength to chew through meat. So, they are actually considered to be herbivores and they mainly eat vegetation from the grasslands of Australia.
While they are long, these creatures also look very sweet. Many people dream of keeping a wombat as a pet, but unfortunately this is something that should remain a dream. While wombats are not dangerous in most cases, they simply would not make good pets which they should remain in the wild.
Typically, the gestation period for a wombat will be around 3 weeks with labor occurring around day 20 or day 21. Development will continue in the pouch for around 5 whole months before the wombat emerges into the outside world.
Tasmanian Devils
Just like many of the other animals that we have looked at in this guide, Tasmanian Devils are naturally found in the Tasmania region of Australia. Tasmanian Devils are a type of marsupial, but they are more famous for being a very aggressive and dangerous type of animal. In fact, they are the most carnivorous marsupial on the planet and their favorite food is meat.
When you see these creatures, it can be very difficult to imagine how dangerous they are. They aren’t as intimidating in appearance as a brown bear or a lion, for example, but they are still a very dangerous creature. Their rise to the top of the marsupial food chain has largely been because there are very few predators left that actively hunt Tasmanian Devils.
Tasmanian Devils typically only weigh around 6 kg for females, and 8 kg for males. Traditionally, they were only found in Tasmania, hence their name, but they have been reintroduced into the New South Wales region of Australia with a very small breeding population to help biodiversity.
Unlike many other marsupials we have looked at so far, it is unlikely that you will want to keep one as a pet. With their sharp teeth and aggressive nature, they would not make good pets, and you would have to be a little bit crazy to even attempt to domesticate one. They do not live in groups, they are solitary animals and as a result it is rare for you to find more than one Tasmanian Devil in an area.
There are so many obvious features that tell Tasmanian Devils apart from other creatures. They are incredibly fast, they have ears that turn red, and are well known for running in circles. Just like Taz, from the Looney Tunes.
Despite the aggressive nature of these creatures, there is concern over these creatures becoming extinct due to a number of factors that are killing the population. The habitat of these creatures is shrinking, a large number of Tasmanian Devils are dying from facial tumors, and feral cats are starting to become a predator for these creatures. The number of Tasmanian Devils left in the wild is sadly shrinking, and this is part of the reason why they have been re-introduced to New South Wales.
Like some of the other marsupials we have looked at in this guide, the gestation period for these creatures is around 3 weeks. After this, development will continue for a further 4 months in the mother’s rear-facing pouch until the baby Tasmanian Devil is ready to emerge.
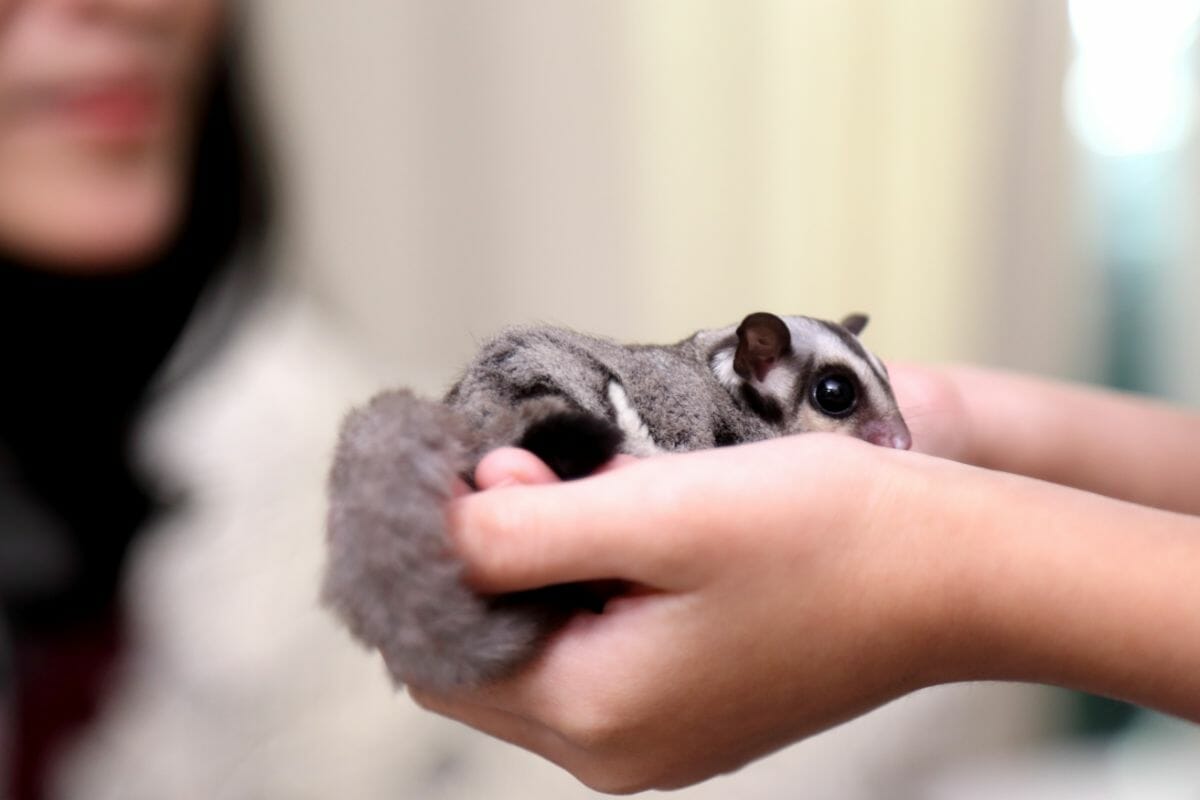
Sugar Gliders
Just like opossums, sugar gliders are another of the few types of marsupials that are suitable to be kept as a pet. These creatures are totally adorable, and once you see one, we’re sure you’ll be desperate to get one as a pet! But before you do, you may want to check if they are legal in your State.
Sugar gliders, not to be confused with squirrel gliders, are part of the glider family of marsupials. They are well-known for their funny noises, strong smell, and tiny adorable faces. As pets, they require a lot of care and attention, which is why you should really do your research before you purchase one as a pet. But the care is totally worth it because your sugar glider will recognize you as their owner, even if you have to potty train them.
Like a couple of the different marsupials we have looked at in this guide, sugar gliders are omnivorous which means they eat a mixture of meat and vegetables. So this is definitely something that you need to bear in mind before purchasing a sugar glider as a pet!
The gestation period for these little creatures is just 17 days, and they will spend a further 70-74 days in the pouch after they are born.
Frequently Asked Questions
Are Marsupials Dangerous?
Ultimately, whether, or not, marsupials are dangerous will differ depending on the type of marsupial you are talking about. All marsupials have the potential to be dangerous, especially when they feel threatened. Even the most docile of animals is likely to lash out if they feel like they are being attacked, or that their loved ones are at risk.
However, with the exception of Tasmanian Devils, most marsupials do not actively tend to be aggressive. Instead these creatures will only exhibit aggressive tendencies if their space is being invaded, if they are protecting their family, or if they are hurt. That is why it is always best to leave animals in the wild, and not to invade their personal space at any time. Even if they might appear cute and cuddly.
Can You Keep A Marsupial As A Pet?
The majority of marsupials cannot be kept as pets. Some of the most adorable marsupials, such as quokkas and koalas are not suitable to be kept as pets for a variety of reasons. Some of the main ones being the diseases that these animals have, and simply the fact that a domestic environment is not normal for these creatures.
That being said, there are some marsupials which can be kept as a pet. So if this is something that you are eager to do, it is possible. These creatures include the opossum and the sugar glider. So, if you are eager to keep a pet marsupial, these are the animals to consider.
Are Marsupials Endangered?
Again, the conservation status of marsupials differs depending on the species of marsupial that you are looking at. While there are some marsupials that exist in abundance, such as the sugar glider or the wallaby, there are others that are at threat due to a variety of things.
The population of Tasmanian Devils has decreased significantly, so much so that they have been introduced to areas outside of Tasmania. A huge influx of stray cats is really affecting Australia’s biodiversity, and one of the species that these cats are impacting is the Tasmanian Devil. In addition, a genetic predisposition to jaw tumors and the destruction of their natural habitat is only reducing the habitat further.
Likewise, koalas are being chased out of their natural habitat by human beings and through the huge amount of wildfires that have occurred in recent years. So while some marsupials are totally safe, there are others that are at real risk of extinction.
Do Marsupials Have Health Problems?
Like all animals, marsupials will be prone to health problems. As we have just said, Tasmanian Devils are prone to jaw tumors, and this is true of all macro pods. Different species of marsupial will be impacted with different health problems, and that is without mentioning the fact that a lot of pregnancies in these animals are unsuccessful.
So this is just another thing that is threatening certain marsupials with extinction.
Are There Different Types of Possum?
We’ve only spoken about the opossum in this guide, and that is because this is the only marsupial that can be found in the United States. However, it isn’t the only type of possum. In fact, there are lots of other types of possum that exist. For example, there are brush-tail possums that can be found in Australia, scaly-tailed possums that can also be found in Australia, and lots more.
Are Moles Marsupials?
Looking at the different species of animals that we have identified as marsupials in the guide above, it is understandable that you may be wondering if moles are marsupials too. There are lots of similarities between some of the marsupials we have looked at and moles, so it is easy to see how you might get to this thought process.
However, the majority of moles are not marsupials. While they may have similarities, a large portion of moles do not have pouches to carry their young, and as a result, they are not marsupials. However, there is one type of mole that is a marsupial and that is the marsupial mole.
There are 2 types of marsupial mole: the Southern and Northern marsupial mole. Both of these moles live in desert areas, and they are both native to Australia.
Are Raccoons Marsupials?
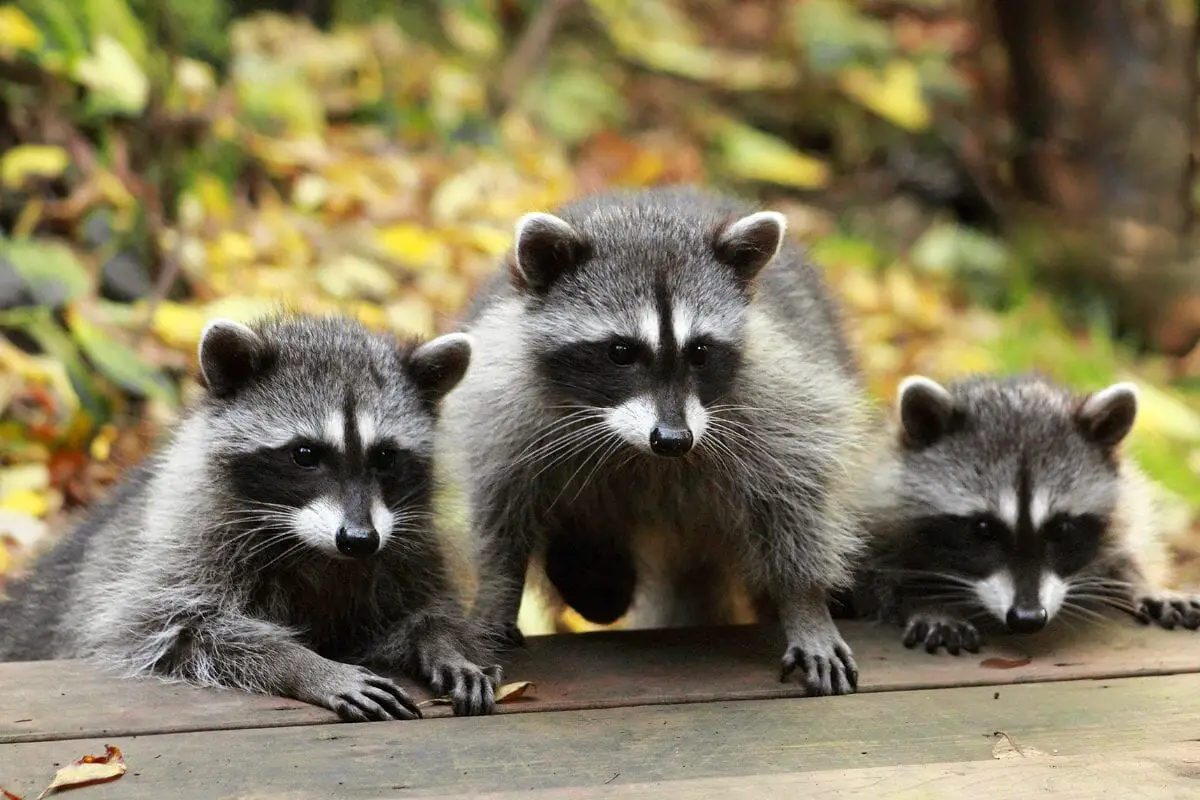
Finally, you might be wondering if raccoons are marsupials. After all, raccoons and opossums are very similar to one another, and opossums are marsupials. But what about raccoons? While they may have similar behaviors, raccoons are not marsupials. They do not carry their young in a pouch, and as a result they do not belong to this group of animals.
Summary
Through all the information that we have covered in this guide, we hope you are feeling a lot more confident about what a marsupial is. As you can see, there are lots of different types of marsupials that exist, and while the majority live in Australia, they can be found in other areas too.
Marsupials aren’t a species, like big cats are, instead they are simply a way of collectively identifying animals that give birth to their offspring, and have a pouch in which their young continues to develop after birth. We’re confident that after reading this guide, you’ll know everything you need to know about marsupials! Now that you know what are marsupials, see which of these animals mentioned start with the letter K?
